Showing posts with label Cookies. Show all posts

Monday, July 6, 2009

Strawberry Sandwich Cookies

Posted by BAKE-EN at 3:48 PM 0 comments


Martha Stewart's Cookies is my latest cookbook obsession. I bought it last week at TJ Maxx (yes, I did get the max for the minimum), and have been obsessing over most of the recipes ever since. Each recipe has a picture, which I love. They are not just pictures either; they're pictures from Martha Stewart's talented staff, so they look amazing. I hope to one day take pictures as good as theirs.

I wanted to make macaroons for the 4th of July, but it wasn't in the cards. Instead, I made Martha's cookie dough recipe for her raspberry cream sandwiches. The dough is full of vanilla flavor. The recipe calls for a whole vanilla bean and 2 teaspoons of vanilla extract. I was afraid the vanilla would overpower my jam, so I used half a vanilla bean and only 1 teaspoon of vanilla extract. I also added a heaping ¼ teaspoon of freshly ground black pepper to bring out the pepper in the jam. The dough was delicious and I had high hopes for the finished baked cookie.


While baking, the dough spread more than I thought it would. I ended up cutting the baked cookies with a cutter to get the shape I wanted. The flavor of the dough was good, but very sweet. Once I added the strawberry jam they were sugar bombs, and I was running for my toothbrush after eating one. I wouldn't combine this cookie dough and jam together again. The dough is delicious on its own though, and I bet it would be great with some bittersweet chocolate. I have lots of left over dough to play with, so I think I might try to use it as a flat tart base later in the week. If I do I'll be sure to post my results.


(Not my) Grammy’s Chocolate Cookies

Posted by BAKE-EN at 11:56 AM 1 comments


Martha strikes again. Grammy's chocolate cookies are addicting, chewy, crunchy (from the turbinado) and insanely chocolaty. They spread a lot while baking and become very flat; making them the perfect cookie for sandwiching with some vanilla ice cream.

For the recipe, please reference Martha Stewart's Cookies or visit Martha's website here.


The only difference I saw between the two recipes is the book calls for an additional 2 tablespoons of AP flour; and it calls for rolling the cookies in sanding sugar (not granulated). I highly suggest rolling the cookies in either turbinado or sanding sugar. Sanding and turbinado sugars add a nice crunch to baked items because they typically don't dissolve in the oven.


Another suggestion I have is use the best cocoa powder you can get your hands on. The cocoa flavor dominates this cookie, so the better the cocoa powder the better the cookie.


Tuesday, June 9, 2009

Sour Cherry Vanilla Jam with Salty Almond Cookies

Posted by BAKE-EN at 4:40 PM 3 comments


Cherries are my mom's favorite fruit, so this past Mother's day I decided to make her sour cherry jam. Growing up, we had a big sour cherry tree in our backyard. Once we fought past the birds we would pick buckets of cherries during the height of the season. Then off to the kitchen we went for the messy task of pitting the cherries. Covered in cherry juice we would spend the next hour wiping down ourselves and sometimes the kitchen walls. They were juicy.

The following recipe yields a sweet tart jam with a hint of complexity due to (I think) the vanilla and sourness of the cherries. The jam is lovely sandwiched between salty almond cookies (recipe follows).


Sour Cherry Vanilla Jam from Madelaine Bullwinkel's Gourmet Preserves

2 pounds pitted sour cherries

1 pound granny smith apples (2 ½ cups peeled and chopped)

1 vanilla bean

2 tablespoons fresh lemon juice

2 ¼ cups sugar

Place the cherries in a good processor and pulse for 15 seconds to chop them medium fine. Peel, core and quarter the apples. Chop them to a medium-fine texture in the processor. Combine the cherries and apples in a 5 quart pan.


Scrape the seeds from the vanilla bean, and add the seeds and pod to the fruit. Cover the pan and bring to a boil. Uncover and simmer for 15 minutes to reduce the juices, stirring regularly. The mixture will thicken, but should not stick.

Stir in the lemon juice, and then add the sugar in 4 equal batches, waiting for the liquid to return to the simmer before adding more. Stir frequently. Let the jam actively cook 10 minutes more. It will noticeably thicken and reach a temperature of 210 to 212 F.

Pour the jam into a heat resistant 1-quart measure. Remove the vanilla pod. Fill hot, sterilized jars to within ¼" of lips. Wipe the rims clean; attach new lids and screw caps on tightly. Process in boiling water for 10 minutes.


Salty Almond Cookies (or JV Snacks-Croq-Télé) from Dorie Greenspan's Paris Sweets

These cookies are extremely easy to make if you have a food processor. Once the dough was made, I tried 3 different shape cookies. The first as described by Dorie was the easiest, but a little too rustic for me. I formed the rest of the dough into logs and tried to make slice and bake cookies with the dough. It worked, but not very well. The last method I tried was I shaped tiny cookies by pressing the dough into my ¼ tsp and slid them out. They were extremely cute, but time consuming.


¾ cup (100g) blanched almonds

½ cup (100g) sugar

¼ tsp to ¾ tsp salt (I used ¾ tsp of Kosher salt)

1 cup (140g) AP Flour

7 tablespoons (100g) cold unsalted butter cut in 7 pieces

Preheat oven to 350.

In a food processor fitted with a metal blade, process the sugar, nuts and salt till finely ground. Make sure to scrape the bowl frequently. Once processed turn the mixture out of the bowl.

Put the flour in the food processor and with the motor running drop in the cold butter pieces. As soon as the butter is in; switch to pulse mode. Pulse till the mixture looks sandy. Add the sugar-nut mixture and pulse until the dough forms small clumps and curds. Scrape the dough out onto a piece of parchment or wax paper.

To shape the cookies take small pieces (about the size of a cherry) in your hand and form irregular sized chunks. Place the pieces on a lined baking sheet leaving ½" space between them. Bake for 9-11 minutes rotating the pans after 5 minutes. You want the baked cookie to set, but not brown.


Tuesday, February 24, 2009

TWD Caramel Crunch Bars

Posted by BAKE-EN at 4:05 PM 15 comments


Whitney of What's left on the table? chose Caramel Crunch Bars as this week's TWD recipe. I made these delicious bars a while back and sandwiched them with ice cream. They were truly decadent. Today, I made a half batch knowing how addictingly good they would be. There's no sense in setting myself up to eat a 9x13 pan of these goodies.

One thing most people don't know about me is that though I am a pastry chef, I can't find a thing at the grocery store. Honestly, I used to know my way around a grocery store till I move to St. Helena. Anyone who's ever been to the Stop and Shop (or is it a Star market?) knows what I'm talking about. The butter is in the beer isle. THE BUTTER IS IN THE BEER ISLE!!!! That makes no sense at all, and one day I spent a good 15 minutes looking for butter! Once I finally got used to grocery stores in Northern California, we moved back to Boston, so here I am lost once again. The only place where I can get in and out quickly is Trader Joe's, and that's only because it's so small. All that being said, I decided that rather than spending an hour looking for Heath Toffee bits at the grocery store, I would be better off making toffee at home. I'm not sure where I got this recipe, but it's pretty good, and really easy. The only change I would make for next time is to cook it a little longer. I cooked the candy to 294F, but I think I should have gone up to at least 300F. After reading some recipes afterwards I discovered some people cook their toffee to as high as 310F. Here's the recipe I used:

½ # Butter

1 cup Sugar

1 Tbsp Corn Syrup

1 tsp Kosher Salt

3 Tbsp water

Method: Put it all in a heavy bottomed pan. Stir frequently and bring mixture to 300 degrees (see above). Pour onto a silpat and let harden.

This toffee recipe will make more than enough toffee for the caramel crunch bars (full size).


The recipe for the bars is super easy. Basic creaming method followed by vanilla extract then dry ingredients and chopped chocolate. I love that this recipe calls for instant espresso powder for two reasons. One is that the bitterness of the espresso powder balances the sweetness of the bar itself. Second I'm happy to be using one of the obscure items in my pantry.

These bars are very good. I think I prefer them sandwiching vanilla ice cream then on their own though. Next time I make them with the intention on serving them as bars, I will use less chocolate on top and I'll sprinkle some sea salt in addition to toffee on top of the bars.


Tuesday, February 3, 2009

TWD Baked or Unbaked Deliciousness

Posted by BAKE-EN at 8:22 PM 17 comments


World peace cookie dough is the best unbaked dough I've ever made at home.** Friends who knows me really well (especially in a work environment) know the years of research and caloric intake it took to make such a bold statement. Prior to culinary school I was a bit squeamish about tasting anything raw, but my friend and schoolmate Erin clued me in to how good doughs and batters were raw. Erin even went so far as to eat raw yeasted dough-more than once! (Side note-Erin, maybe you're actually growing a chocolate cherry loaf in your belly?) Thanks to Erin, I've been trying raw cookie dough ever since and I'm proud to say that I think it's made my immune system stronger!

So yes, World peace cookies are amazing raw (no raw eggs to worry about either, so you can go crazy). They are also amazingly simple to put together. Good ingredients are key to making these cookies amazing.


I made my cookies with Valrhona cocoa powder, fleur de sel from Brittany and a combo of Scharffenberger 70% and Callebaut milk chocolate. Those ingredients with fresh butter and King Arthurs flour combined to create an addicting chocolate cookie.


The salt in these cookies really brightens the flavors of the chocolate, and makes them feel more "adult." Thanks to Jessica of Cookbookhabit for chosing this recipe. You can find the recipe at her website.


**Sofra employees know that the best unbaked cookie dough in a bakery is either Maureo or Chocolate Chunk (the debate will never end-they are both that good).


Tuesday, October 14, 2008

Cookie Love

Posted by BAKE-EN at 7:44 PM 4 comments


I randomly stumbled upon this recipe last night while poking around on Chow. Apparently the recipe is from Cooks Illustrated. I decided to make them because I had all the ingredients on hand, and people on Chowhound were raving.

The only thing I regret about making these, is that I didn't double the recipe. Brown butter and brown sugar mixed together in a cookie…pure bliss.

Brown Sugar Cookies

Makes 2 Dozen Cookies
14 tablespoons unsalted butter (1 3/4 sticks)
1/4 cup granulated sugar (about 1 3/4 ounces)
2 cups packed dark brown sugar (14 ounces)
2 cups unbleached all-purpose flour plus 2 tablespoons (about 10 1/2 ounces)
1/2 teaspoon baking soda
1/4 teaspoon baking powder
1/2 teaspoon table salt
1 large egg
1 large egg yolk
1 tablespoon vanilla extract


Heat 10 tablespoons of the butter in a pan over medium-high heat until melted. Continue to cook the butter until it is browned a dark golden color and smells nutty, about 1 to 3 minutes. Transfer the browned butter to a bowl and stir the rest of the butter into the hot butter until it melts- let this rest for 15 min. Preheat oven to 350 degrees F. In a baking dish, mix granulated sugar and a ¼ cup of the brown sugar until combined well; set this mixture aside to roll dough balls in. Mix flour, baking soda, and baking powder in a bowl. Add 1 ¾ cup brown sugar and salt to cooled butter and mix until there are no lumps. Add egg, yolk, and vanilla to butter mixture and mix well, then add flour and mix until just combined. Roll dough into balls about 1 ½ inches in diameter, and roll balls in brown sugar and white sugar mixture. Place balls about 2 inches apart on parchment lined baking sheets.


Bake sheets one at a time until cookies are puffy and lightly browned, about 12- 14 minutes. (It says the cookies will look slightly raw between some of the cracks and seem underdone, but be careful not to overbake.) Cool on sheet for about 5 minutes and then transfer to a rack to cool.


TWD Lenox Almond Biscotti

Posted by BAKE-EN at 9:10 AM 21 comments


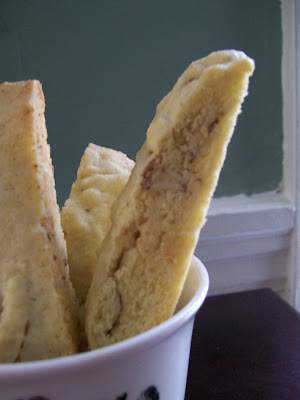
I've made a lot of biscotti recipes over the past few years. They were on my production list when I worked at Bouchon, so I've made literally thousands of them. I once made 5 different kinds of biscotti for everyone I knew as Christmas gifts. All that being said, I love really good biscotti. My definition of good biscotti is a cookie that's firm on the outside, but still a little soft on the inside. I hate biscotti that cause me to contemplate calling the dentist, as in; did I just break my tooth on this thing?

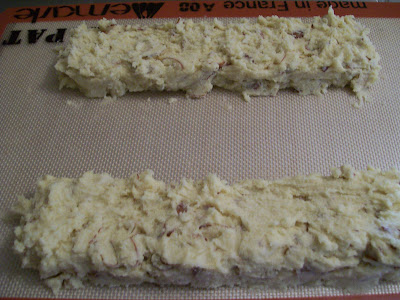
After reading Dorie's description of these cookies, I decided they were a must try. At first I was going to make one of the playing around recipes, but when I read that she makes these cookies in double batches twice a week, I thought maybe I should try the original recipe first. I'm glad I did. The recipe itself is really easy. Basically cream butter & sugar, add eggs, add dry, fold in nuts. One thing that surprised me was that Dorie didn't call for resting the dough. I find that biscotti dough firms up, and is easier to form into a log if you let it rest in the fridge for a while. That being said, I followed Dorie's directions, and I formed the logs right after making the dough.


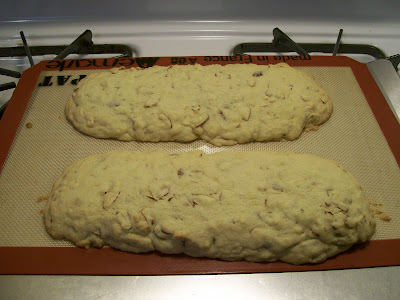
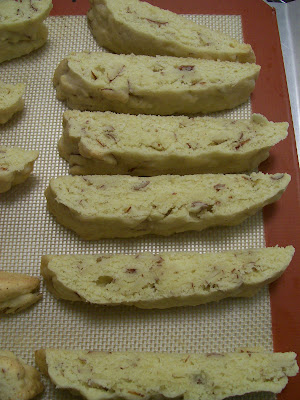
They were a little sticky, but easy enough to shape. I was surprised by how much my biscotti spread in the oven, but they ended up looking great once I cut them.


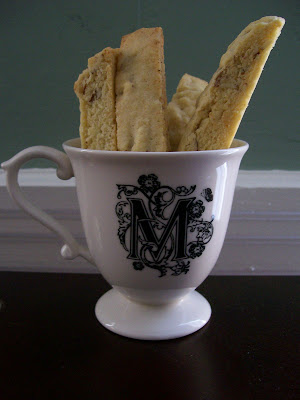
This turned out to be one of the most delicious biscotti's I've ever eaten. The almond flavor is amazing, it actually tastes like there's almond paste in the cookies because they're so tender on the inside. I found Dorie's description of them to be true "crunchy but not rock solid, dippable, dunkable and eminently munchable." Many thanks to Gretchen of Canela & Comino for choosing this recipe. Because of you, Gretchen, I was able to justify eating a cookie for breakfast this morning. Anyone interested in making this recipe, can find it on Gretchen's website.


Tuesday, May 20, 2008

TWD Traditional Madeleines & a side of croissant

Posted by BAKE-EN at 9:37 AM 25 comments
There’s something about Madeleines that I love. To me, they are simply the most beautiful baked good; part cookie, part cake; usually scented with a touch of lemon. They were one of my favorite things to bake when I worked at Bouchon bakery.

As with many recipes, I already have a favorite Madeleine recipe. My go-to recipe was posted in Gourmet magazine back in 2006. It has honey, and the flavor is absolutely perfect, sweet yet delicate. Knowing how great all of Dorie’s past recipes have been, I was excited to see how the recipes compared.

The recipe itself was extremely easy. Whip eggs with sugar/lemon mixture till light, fold in dries, then fold in melted butter. I love recipes that take less than a few minutes to make. I piped the batter into my Madeleine molds because it is so much easier (and cleaner) than plopping spoonfuls in. I have what I think are traditional sized madeleine pans, but my yield was more than 12. I ended up with 20 Madeleines. Then I had to wait 3 hours to bake them off.
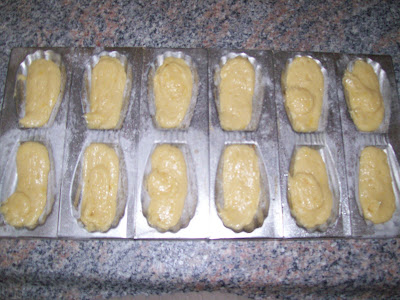


Tick Tock, Tick Tock…

As luck would have it, I had something to bake off while I was waiting for my Madeleines to chill.
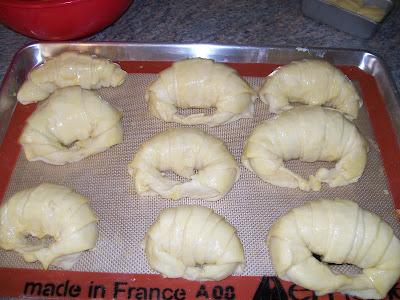
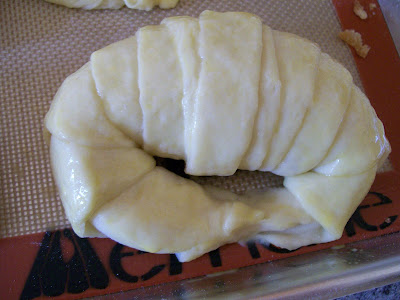


Last week, I made the croissant dough from Baking with Julia. This morning I shaped them into crescent shapes, and then set them aside to proof. My kitchen is extremely cold (aside from the oven, there’s no heat in it). The recipe said it would take 3 to 4 hours to proof. They actually took 6 hours before they were fully proofed. We went from having afternoon tea with fresh croissants, to having a dinner of croissants sandwiched with gruyere and ham with a side salad. Believe me when I say, they were worth the wait. Absolutely amazing flake and so buttery. I used Plugra (butter), which made them stand out even more. I’ve already eaten one and a half croissants and they’ve been out of the oven for only an hour. I better put some in the freezer soon, or else I’m will be feeling very guilty tomorrow. My only problem with the croissants is dissatisfaction with the person who shaped them (me), they look a bit like crabs.
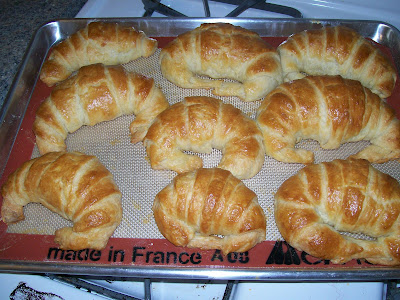
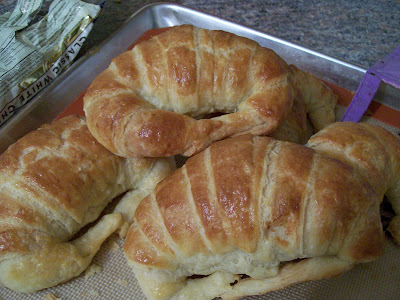


Back to the Madeleines.
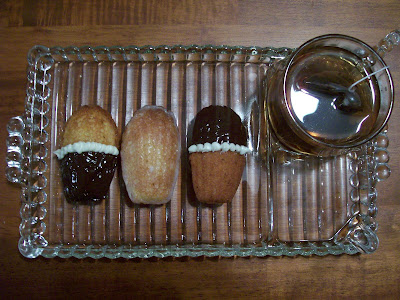


They baked in 11 minutes. Once they were out of the oven, I played around with them a bit. Chocolate on some, a lemon glaze on others and confectioners sugar on the rest. The overall flavor of the madelines was nice. They were more cookie than cake; I like them the other way around.
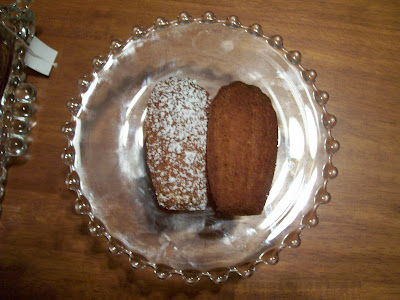
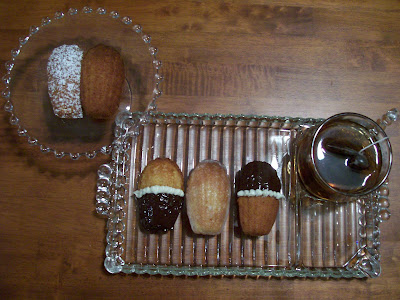


I prefer the recipe from Gourmet to this Madeline recipe. Unfortunately, I'm not the only person with an opinion in my household :) My husband loved this recipe declaring it "the best Madeleine he's ever had." Looks like I'll be making these again.

Here's the recipe for Traditional Madeleines:

2/3 cup all-purpose flour
¾ teaspoon baking powder
Pinch of salt
½ cup sugar
Grated zest of 1 lemon
2 large eggs, at room temperature
2 teaspoons pure vanilla extract
¾ stick (6 tablespoons) unsalted butter, melted and cooled
Confectioners' sugar, for dusting

Whisk together the flour, baking powder and salt.

Working in a mixer bowl, or in a large bowl, rub the sugar and lemon zest together with your fingertips until the sugar is moist and fragrant. Add the eggs to the bowl. Working with the whisk attachment, or with a hand mixer, beat the eggs and sugar together on medium-high speed until pale, thick and light, 2 to 3 minutes. Beat in the vanilla. With a rubber spatula, very gently fold in the dry ingredients, followed by the melted butter. Press a piece of plastic wrap against the surface of the batter and refrigerate it for at least 3 hours, or for up to 2 days. This long chill period will help the batter form the hump that is characteristic of madeleines. (For convenience, you can spoon the batter into the madeleine molds, cover and refrigerate, then bake the cookies directly from the fridge; see below for instructions on prepping the pans.)

GETTING READY TO BAKE: Center a rack in the oven and preheat the oven to 400 degrees F. Butter 12 full-size madeleine molds, or up to 36 mini madeleine molds, dust the insides with flour and tap out the excess. Or, if you have a nonstick pan (or pans), give it a light coating of vegetable cooking spray. If you have a silicone pan, no prep is needed. Place the pan(s) on a baking sheet.

Spoon the batter into the molds, filling each one almost to the top. Don't worry about spreading the batter evenly, the oven's heat will take care of that. Bake large madeleines for 11 to 13 minutes, and minis for 8 to 10 minutes, or until they are golden and the tops spring back when touched. Remove the pan(s) from the oven and release the madeleines from the molds by rapping the edge of the pan against the counter. Gently pry any recalcitrant madeleines from the pan using your fingers or a butter knife. Transfer the cookies to a rack to cool to just warm or to room temperature.

If you are making minis and have more batter, bake the next batch(es), making certain that you cool, then properly prepare the pan(s) before baking.

Just before serving, dust the madeleines with confectioners' sugar.

makes 12 large or 36 mini cookies

serving: Serve the cookies when they are only slightly warm or when they reach room temperature, with tea or espresso.

storing: Although the batter can be kept in the refrigerator for up to 2 days, the madeleines should be eaten soon after they are made. You can keep them overnight in a sealed container, but they really are better on day 1. If you must store them, wrap them airtight and freeze them; they'll keep for up to 2 months.
 

Bake-En Copyright 2009 Sweet Cupcake Designed by Ipiet Templates Image by Tadpole's Notez