Tuesday, April 29, 2008

TWD Fluted Polenta and Ricotta Cake

Posted by BAKE-EN at 8:35 AM 15 comments
Caitlin of Engineer Baker chose the Fluted Polenta and Ricotta Cake as this weeks TWD recipe. Essentially it is a tea cake containing honey, polenta, ricotta and dried Mission (in my case) figs baked in a tart shell. I love all of the above ingredients, so I was more than willing to try this recipe. In fact, a few weeks ago I was thumbing through Baking From My Home to Yours, and I secretly wished that someone would select this cake soon. Clearly Caitlin is a psychic fairy godmother of sorts.

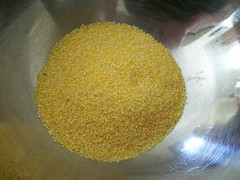
As far as ingredients were concerned, I bought some beautiful organic cornmeal at whole foods. The scent of corn when I opened the bag was heavenly.


My dried Mission figs were purchased at Trader Joes, as was the ricotta. The figs were super moist, so there was no need to soak them. I did halve the figs though because I prefer to eat small bits of dried fruit over large ones. Also, I knew that if I halved them, I would get a nice distribution of figs throughout the cake. Finally, I had some Orange Blossom honey in the cupboard, so I decided to use that.


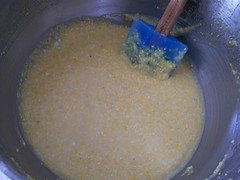
I found the recipe simple to follow. The only questionable section was whisking the ricotta and water until “very smooth.” My ricotta never did get all that smooth. I mixed it for 5 minutes on low, and decided that it was as smooth as it was going to get. I considered pushing the water/ricotta mixture through a chinois to make the ricotta particles smaller, but I thought that might be a great example of just how “Type A” I really am. My batter was extremely thin, but it baked beautifully. I didn’t have a 10 1/2” tart pan, so I used my 9” and I filled 4 little molds that I have with the rest of the batter.

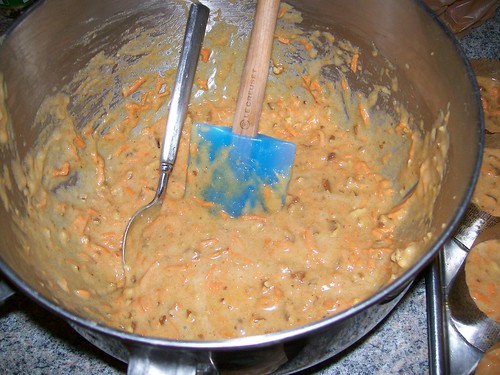
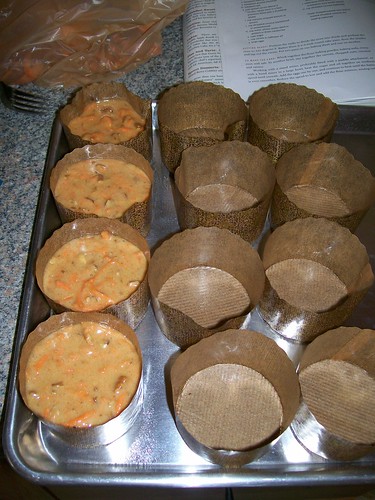
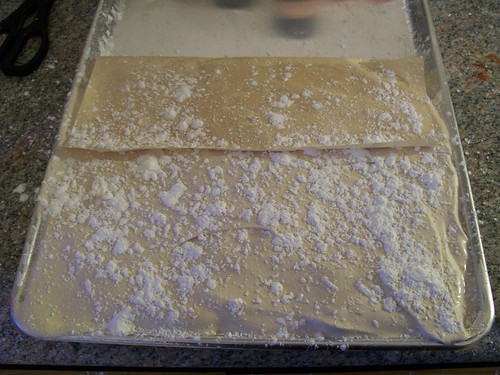
Here are some pictures of the baking process.

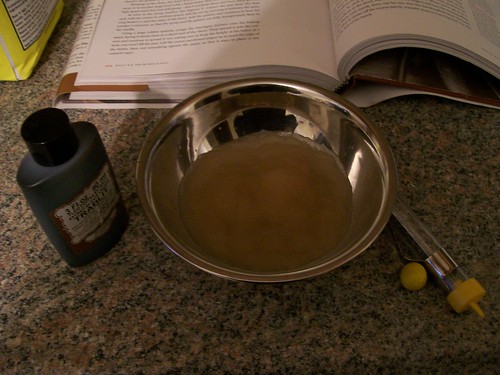
First my thin, but beautiful, batter:


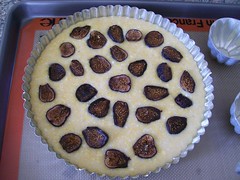
The tart pan and mini-cakes half full with the figs layed out:


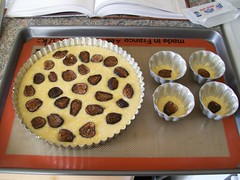
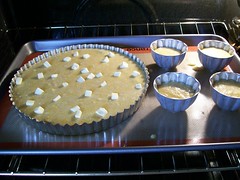
The cakes right before they started to bake:


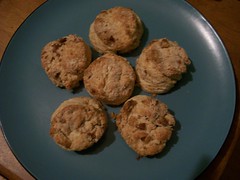
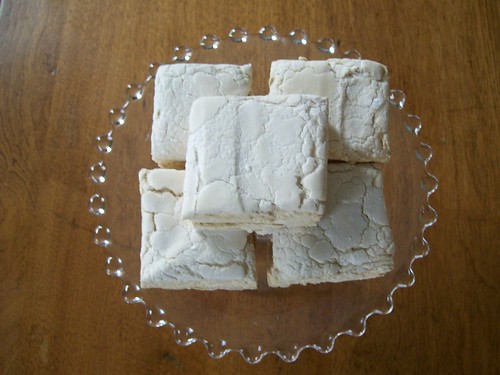
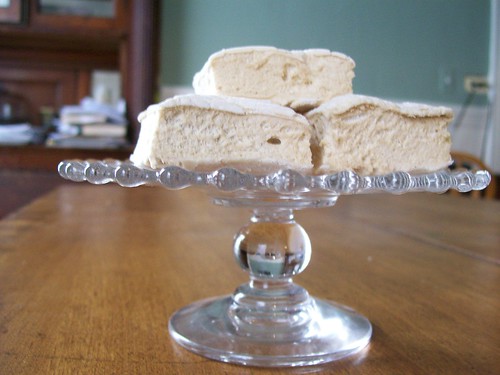
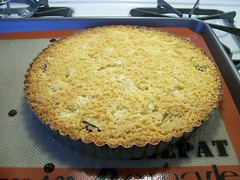
The orange blossom honey in the cake made my whole kitchen smell like orange blossoms while it was baking. It was amazing. I took my mini-cakes out of the oven at 35 minutes, but I left the 9” in for about 15 more minutes. I was surprised by how raw it was in the middle at 35 minutes of baking. The mini cakes ended up looking pretty cute.


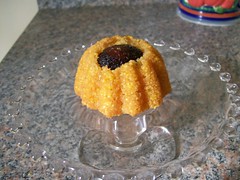
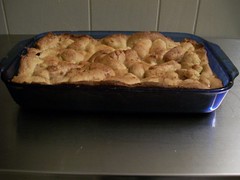
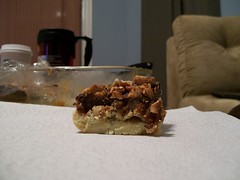
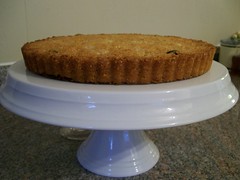
The little layer of cake over the fig half got stuck to the inside of the molds, so the cakes ended up looking kind of like flowers with the exposed fig. The 9” was beautiful as well. It became a nice golden color after baking.


I plan on making this cake again. I think it will be a lovely addition to my arsenal of recipes under the subject “perfect winter dessert.” The cake itself was a little too sweet for my liking, but I know that my French Canadian relatives would love the level of sweetness. Maybe I should put it under the subject of “perfect for a person with sweet-tooth.”

Here's the recipe:

Fluted Polenta and Ricotta Cake

About 16 moist, plump dried Mission or Kadota figs, stemmed
1 c. medium-grain polenta or yellow cornmeal
½ c. all-purpose flour
1 tsp baking powder
1 c. ricotta
1/3 c. tepid water
¾ c. sugar
¾ c. honey (if you’re a real honey lover, use a full-flavored honey such as chestnut, pine, or buckwheat)
Grated zest of 1 lemon
2 large eggs

Getting Ready: Center a rack in the oven and preheat the oven to 325 degrees F. Butter a 10 ½-inch fluted tart pan with a removable bottom and put it on a baking sheet lined with parchment or a silicone mat.

Check that the figs are, indeed, moist and plump. If they are the least bit hard, toss them into a small pan of boiling water and steep for a minute, then drain and pat dry. If the figs are large (bigger than a bite), snip them in half.

Whisk the polenta, flour, baking powder, and salt together.

Working with a stand mixer fitted with the whisk attachment or with a hand mixer in a large bowl, beat the ricotta and water together on low speed until very smooth. With the mixer at medium speed, add the sugar, honey, and lemon zest and beat until light. Beat in the melted butter, then add the eggs one at a time, beating until the mixture is smooth. Reduce the mixer speed to low and add the dry ingredients, mixing only until they are fully incorporated. You’ll have a sleek, smooth, pourable batter.

Pour about one third of the batter into the pan and scatter over the figs. Pour in the rest of the batter, smooth the top with a rubber spatula, if necessary, and dot the batter evenly with the chilled bits of butter.

Bake for 35 to 40 minutes, or until a thin knife inserted into the center of the cake comes out clean. The cake should be honey brown and pulling away just a little from the sides of the panm, and the butter will have left light-colored circles in the top. Transfer the cake to a rack and remove the sides of the pan after about 5 minutes. Cool to warm, or cool completely.

Tuesday, April 22, 2008

TWD Bill’s Big Carrot Cake

Posted by BAKE-EN at 10:04 AM 26 comments


Okay, I have to admit that I played around with this recipe a bit. First off, I decided to lighten it up. Summer is quickly approaching and if I ever want to see myself in a bathing suit (gasp), something's got to give! I cut back the oil and sugar in this recipe by 25% (¼ cup and ½ cup less respectively). I also subbed half the flour with whole wheat. I don't care for coconut, and I hate raisins in baked goods, so those were out as well. Due to the reduction in oil, I increased the carrots by ½ cup for extra moisture.

Even with all the changes, I really liked the resulting carrot cake. It was moist with great carrot and pecan flavor. I ended up making cupcakes, which I'll forever think of as Michelle's Big Carrot Cup Cakes, because they were huge! I baked the batter in 12 individual sized panettone wrappers (I like to think of them as upscale cupcake papers). The cakes rose so nicely that they were almost too tall to eat. The icing was nice, though next time I'll use vanilla extract and not lemon juice. I thought the lemon overpowered the cream cheese flavor a bit.

As a garnish, I candied some carrot strips and attempted to make ribbons out of the strips. Next time I'll use longer carrots because my strips were so short, it was difficult to tie the ribbon. I ended up breaking up some of the candied carrot strips and using them as confetti, which looked cute.

Luckily, my official taste tester was around to see if my changes to the recipe would result in an inferior product. After eating his first cupcake, Joe said "so, if they have less fat and whole wheat flour in them, I can eat another; right?" I'll call that cupcake success.

Pictures and recipe below. The changes I made are in italics.

Bill's Big Carrot Cake

Baking: From My Home to Yours by Dorie Greenspan

Ingredients:

For the cake:

1 cup all purpose flour

1 cup whole wheat flour

2 teaspoons baking powder

2 teaspoons baking soda

2 teaspoons ground cinnamon

¾ teaspoon salt

3 ½ cups grated carrots (about 10 carrots)

1 cup coarsely chopped walnuts or pecans

1 1/2 cups sugar

3/4 cup canola oil

4 large eggs

I didn't include: 1 cup shredded coconut (sweetened or unsweetened)

I didn't include: ½ cup moist, plump raisins (dark or golden) or dried cranberries


For the frosting:

8 ounces cream cheese (I used 1/3 less fat), room temperature

1 stick ( 8 tablespoons) unsalted butter, at room temperature

1 pound or 3 and ¾ cups confectioners' sugar, sifted

1 tablespoon fresh lemon juice or ½ teaspoon pure lemon extract

Candied carrot garnish

Getting ready:

I sprayed 12 cupcake liners with release spray and put them on a sheet pan. If you're making cakes, do this:

Position the racks to divide the oven into thirds and preheat the oven to 325 degrees Fahrenheit. Butter three 9-x-2-inch round cake pans, flour the insides, and tap out the excess. Put the two pans on one baking sheet and one on another.


To make the cake:

Whisk the flour, baking powder, baking soda, cinnamon and salt. In another bowl, stir together the carrots, chopped nuts, coconut, and raisins.

Working with a stand mixer, preferably fitted with a paddle attachment, or with a hand mixer in a large bowl, beat the sugar and oil together on a medium speed until smooth. Add the eggs one by one and continue to beat until the batter is even smoother. Reduce the speed to low and add the flour mixture, mixing only until the dry ingredients disappear. Gently mix the chunky ingredients. Divide the batter among the baking pans.

Bake for 40-50 minutes, rotating the pans from top to bottom and front to back at the midway point, until a thin knife inserted into the centers comes out clean. The cakes will have just started to come away from the sides of the pans. Transfer the cakes to cooling racks and cool for about 5 minutes, then run a knife around the sides of the cakes and unmold them. Invert and cool to room temperature right side up.

The cakes can be wrapped airtight and kept at room temperature overnight or frozen for up to 2 months.

To make the frosting:

Working with a stand mixer, preferably fitted with a paddle attachment or with a hand mixer in a large bowl, beat the cream cheese and butter together until smooth and creamy. Gradually add the sugar and continue to beat until the frosting is velvety smooth. Beat in the lemon juice or extract.


Saturday, April 19, 2008

Willow Hill Farm

Posted by BAKE-EN at 7:36 PM 0 comments
Joe and I went to Vermont last month to visit family. While there, my sister and I decided to visit Willow Hill Farm. It's located in Milton, Vermont; which is about 25 minutes away from where my family lives. We drove up I89 till the Champlain Island exit, and then we followed Mapquest there. The farm was very still. For all we could tell we were the only people on the farm at that moment. We drove past the sheep on our right.


Immediately after the flock of sheep was a building in the process of being built. It was still lacking siding. We thought maybe it was where the cheese was being made, BUT we didn't see a sign (think Vermont, mid-winter, lots of snow), so we decided to keep driving up the very steep road in my sister's Suzuki car... well, of course luck would have it that we tried to make it up the hill, but we got stuck in a snow bank! Thanks to Angie's quick maneuvering, we were able to get out after about 10 minutes of going up a few inches, and then sliding down about 10 more! Once we got out of the snow bank we decided to head home. While we were going back down the hill we saw that the building being worked on was actually the cheese shop. Originally, we didn't see the sign because the snow was in front of it, but coming down from a higher angle we were able to see it. We decided to complete our mission, so we pulled over into their driveway. Here's a picture of Angie (my sister) at the store front. There wasn't a person in the store. I guess this time of year in Vermont, it's honor system time; which I love.


For those of you curious, here's a picture of the room they make the cheese in. Sorry it's so bad. I had to take the picture through a glass partition, and this was the best I could get.


As for cheese. We put our $10 in their drop box, and took home the Paniolo and La Fleurie. The Paniolo was extremely pungent. It had many of the charateristics of stinky French cheese (which I adore). La Fleurie on the other than was smooth and rich. It had a nice level of complexity (very earthy, almost piney) to it, but it was mild compared to the Paniolo.


I can't wait to go back to Willow Hill Farm. Winter is a hard time to go because the sheep aren't really producing. I'll be there this spring or summer with a full report on what they have to offer. I'm extremely excited to try their sheeps milk yogurt.

TWD As Promised Pictures from previous posts

Posted by BAKE-EN at 5:13 PM 0 comments
I finally found the cord that connects my camera to my computer! Here are some photos from TWD's Apple Cake, Snickery Bars and Pecan biscuits that I couldn't post before.

Grandmother's Apple Cake:


Snickery Squares:


The nuts cooling on a silpat


The cookie layer, covered with Dulce de Leche and candied peanuts:


The final product:

A square of the final product.


Two perspectives of the Sour Cream Pecan Biscuits:


Is there an easier way to blog?

Posted by BAKE-EN at 4:04 PM 0 comments

Anyone?

Please excuse this tangent, but I have had so many problems blogging lately! I've had whole posts disappear, and then instantly blogger will save the deleted post so all my information is gone. Then, I started blogging in Word, which I love. However, my pictures won't upload from word (learned that one the hard way!). Now I'm blogging in word, uploading my photos to Flickr, and then linking the html from Flickr to my blog. Also, I cannot for the life of me figure out how to widen the area on my page where I post. My postings look so narrow. There has to be an easier way to do this, right?

If anyone has any insight, please let me know. I would love to post in Word and have my whole post (including pictures) uploaded in one easy step.

Sunday, April 13, 2008

TWD Marshmallows

Posted by BAKE-EN at 6:35 PM 14 comments

Marshmallows are one of those sweet items that I feel people either love or hate. Joe doesn't care for them, but I on the other hand, I REALLY care for them. Leave me alone in the house with a bag of marshmallows and I'm pretty sure at least 50% of that bag will be gone by the end of the day. The only reason I drink hot chocolate is because it's a vehicle for marshmallows. Don't even get me started on why I can no longer purchase large tubs of Fluff. Hey, they're fat free, right?


Back in August my friends and I got together for a big night of eating. I decided to make home made smores for the event. I made the Charles Chocolate graham cracker recipe (posted on chow.com), and I made Dorie's Marshmallows. Those were by far the best smores I've ever had. When I saw that TWD was making marshmallows this week, I was really excited to make them again.


This time around I decided to make espresso marshmallows. I have a small bottle of Trablit that I love to add to different desserts for a great coffee flavor. My kitchen was really cold today, so I had to heat my whites over my stovetop (very carefully!) to warm them up. From that point on I followed the recipe pretty much according to the directions. The one thing I noticed is that the recipe called for an extra tablespoon of sugar, but there was no mention of it in the method. I assumed that it was supposed to go into the whites when they were frothy, so that's what I did.

Here are some pictures of the process and of the final product. I can't wait to add these marshmallows to my hot chocolate tomorrow J


Bake-En Copyright 2009 Sweet Cupcake Designed by Ipiet Templates Image by Tadpole's Notez