Tuesday, October 21, 2008

TWD Pumpkin Muffins

Posted by BAKE-EN at 6:32 AM 16 comments


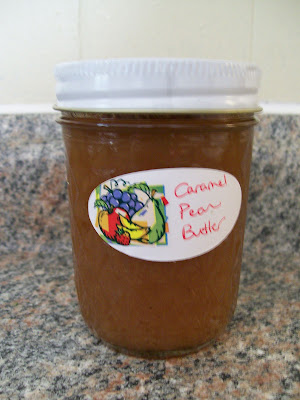
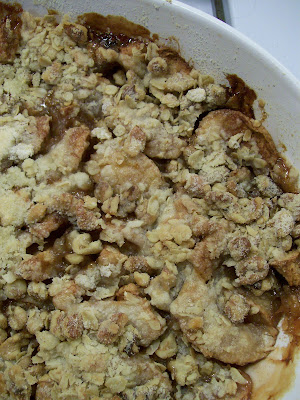
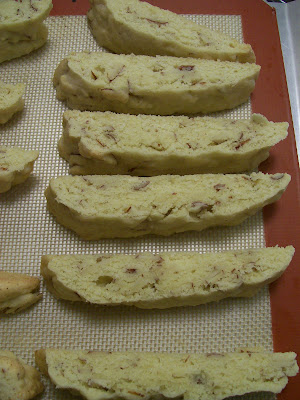
It's that time of the year again. The leaves on the trees have changed, all the bakeries are selling hot mulled cider and pumpkin is showing up on every menu in the Boston area. I have a love hate relationship with pumpkin. I love pumpkin breads and muffins. I love carving pumpkins for Halloween. The only problem with pumpkin is pumpkin pie. The only reason pumpkin pie's a problem is because we're going to be making literally hundreds of pumpkin pies next month! It's not that I hate pumpkin pie, I'm just not a fan of the anxiety I feel when I think about the logistics of baking hundreds of pies. Oh yeah, did I mention we're making our own pumpkin puree? No cans for us, we're a hard core bakery and we only use the freshest ingredients. Next month is going to be a whirl wind of pumpkin and pie dough. It's going to be so much fun, I can't wait to see how it all works out.

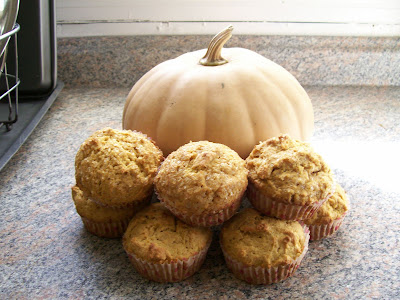
Why all this talk of pumpkin? Because Kelly of Sounding My Barbaric Gulp chose pumpkin muffins as this week's TWD recipe. The recipe was really easy to make, and I followed it to a T except I didn't add nuts or raisins. I was surprised by how thick the batter was. I've been making a lot of breads/muffins lately that use canola oil so I'm used to a wetter batter. This one was very thick.


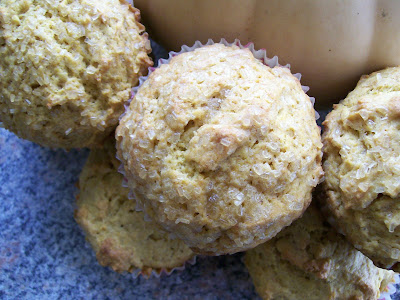
Surprisingly, I didn't like these muffins. I am pretty sure that I overbaked them after reading what other people wrote about this recipe. Foolishly, I decided to would squeeze a quick shower in between putting them in the oven and taking them out. I got back just in the nick of time to take them out at 24 minutes. They were certainly done at that point, so I'm sure I could have taken them out earlier. It seems like other TWD'ers really liked this recipe though, so I'll have to try again soon.


Monday, October 20, 2008

Caramel Pear Butter from Bon Appetit

Posted by BAKE-EN at 2:41 PM 2 comments


When one finds themselves with 10 pounds of pears, what does one do?

In this case, make caramel pear butter. I found the recipe in a recent issue of Bon Appetit and it seemed like it would be a cool gift to give people. One thing I forgot was just how long the whole canning process takes. From cleaning all the jars, to boiling the huge vat of water, to making the recipe; it takes forever! I started this project at about 5:00, and I wasn't finished till 9:15. Over four hours of, ugh, fun?


Here's the recipe. I increase the amount of pears to 7 1/2 pounds because my Moonglow pears were so small I thought they may not yield as much fruit as Barlett's once they were chopped up. I ended up filling 7 1/2 half-pint jars once the recipe was finished.


Caramel-Pear Butter
Brown sugar gives this pear butter a caramel-like flavor. See our guide to canning for additional tips and tricks.
Makes about eight 1/2-pint jars
Recipe by Jill Silverman Hough

October 2008 Ingredients
1/4 cup apple juice
6 tablespoons fresh lemon juice, divided
7 pounds ripe Bartlett pears
3 cups (packed) golden brown sugar
1 teaspoon freshly ground nutmeg
3/4 teaspoon coarse kosher salt


Preparation
Combine apple juice and 4 tablespoons lemon juice in heavy large deep pot. Peel, core, and cut pears, 1 at a time, into 1/2- to 3/4-inch pieces; mix pears into juice mixture in pot as soon as pears are cut, to prevent browning.


Cook over medium heat until pears release enough juice for mixture to boil, stirring frequently, about 16 minutes. Reduce heat to medium-low; cover and simmer until pears are very tender, stirring frequently, about 20 minutes (mixture will splatter). Remove pot from heat. Press pear mixture through fine plate of food mill into large bowl. Return pear puree to same pot. Add 2 tablespoons lemon juice, brown sugar, nutmeg, and 3/4 teaspoon coarse salt. Bring to boil over medium heat, stirring until sugar dissolves.


Reduce heat to medium-low and simmer uncovered until pear butter thickens and is reduced to 8 cups, stirring every 5 minutes to prevent scorching, about 1 hour (I actually stirred it more than that because I could feel the puree starting to cling to the bottom of the pan).


Ladle pear butter into 8 hot clean 1/2-pint glass canning jars, leaving 1/4-inch space at top of jars. Remove air bubbles. Wipe jar threads and rims with clean damp cloth. Cover with hot lids; apply screw bands. Process jars in pot of boiling water 10 minutes. Cool completely. Store in cool dark place up to 1 year.

Meat Cake and Beer Making

Posted by BAKE-EN at 12:17 PM 1 comments


What happens when I leave my husband alone to plan a dinner menu while I'm at work? Meat cake, that's what happens.

A few weeks ago, Joe and I went to Crow Book Shop in Burlington, VT. While I was there I found a copy of David Burke's book David Burke's New American Classics for sale. I purchased it because Joe and I had just been to David Burke's restaurant David Burke and Donatella in NYC the week before and like it. Joe was really excited to see the book because of one recipe in particular; the Meatloaf Bundt Cake. I knew Joe would find a reason to make that cake as soon as possible. The following Sunday, I got a call at work saying we had company coming over and asking "do we have any croissant dough in the freezer?" It was meat cake time. Luckily we did have croissant dough in the freezer because I made the croissant recipe from Baking with Julia a couple of months ago and froze the extra dough.


That night, I came home to what can only be described as a glorious meat cake. It was a sight to behold that's for sure, and the taste was amazing. I know for a fact Joe will be making this again... looks like I should start making more croissant dough.

In addition to making meat cakes, Joe also likes to make beer. On Saturday, he and a friend make two batches of beer at our place. One pale ale and a dark brown ale. I can't wait to see how they turn out.


Tuesday, October 14, 2008

Cookie Love

Posted by BAKE-EN at 7:44 PM 4 comments


I randomly stumbled upon this recipe last night while poking around on Chow. Apparently the recipe is from Cooks Illustrated. I decided to make them because I had all the ingredients on hand, and people on Chowhound were raving.

The only thing I regret about making these, is that I didn't double the recipe. Brown butter and brown sugar mixed together in a cookie…pure bliss.

Brown Sugar Cookies

Makes 2 Dozen Cookies
14 tablespoons unsalted butter (1 3/4 sticks)
1/4 cup granulated sugar (about 1 3/4 ounces)
2 cups packed dark brown sugar (14 ounces)
2 cups unbleached all-purpose flour plus 2 tablespoons (about 10 1/2 ounces)
1/2 teaspoon baking soda
1/4 teaspoon baking powder
1/2 teaspoon table salt
1 large egg
1 large egg yolk
1 tablespoon vanilla extract


Heat 10 tablespoons of the butter in a pan over medium-high heat until melted. Continue to cook the butter until it is browned a dark golden color and smells nutty, about 1 to 3 minutes. Transfer the browned butter to a bowl and stir the rest of the butter into the hot butter until it melts- let this rest for 15 min. Preheat oven to 350 degrees F. In a baking dish, mix granulated sugar and a ¼ cup of the brown sugar until combined well; set this mixture aside to roll dough balls in. Mix flour, baking soda, and baking powder in a bowl. Add 1 ¾ cup brown sugar and salt to cooled butter and mix until there are no lumps. Add egg, yolk, and vanilla to butter mixture and mix well, then add flour and mix until just combined. Roll dough into balls about 1 ½ inches in diameter, and roll balls in brown sugar and white sugar mixture. Place balls about 2 inches apart on parchment lined baking sheets.


Bake sheets one at a time until cookies are puffy and lightly browned, about 12- 14 minutes. (It says the cookies will look slightly raw between some of the cracks and seem underdone, but be careful not to overbake.) Cool on sheet for about 5 minutes and then transfer to a rack to cool.


Almost Apple Picking at Bolton Spring Farm

Posted by BAKE-EN at 9:37 AM 1 comments


Joe and I went to go apple picking at Bolton Spring Farms' yesterday. It was a beautiful fall day, just the right conditions for apple picking. The only thing was that once we got there, we found out they only had one size bag and one price for picking. We just didn't need a bushel of apples for $20! We decided to walk across the street to the farmstand and think it over. While standing there, deliberating about what to do we noticed we were standing in front of a table of seconds. We ended up buying a ½ peck of Paula red apples, 2 ½ pecks of Moonglow pears and a cheese pumpkin for under $8. I was so happy about the great deal that I forgot all about apple picking. As Joe said after "nothing cheers you up like a great deal."

By the way, how beautiful are moonglow pears?


The name alone makes them sound magical.


I've had Alice Medrich's book Pure Dessert on my "Bake from this soon" list for a while. Her recipe for Bea's apple crisp looked delicious, except Joe doesn't like orange zest and I didn't have dried apricots; so I had to omit those two items. Also, she calls for cubing the apple and leaving the skin on, but I prefer skinless apples in recipes like this. Here's my version of her recipe resulting in an exceptionally delicious apple crisp.


Apple Crisp adapted from Pure Dessert

Topping:

½ cup AP flour

½ cup rolled oats

Scant 1 cup coarsely chopped walnut pieces

½ cup sugar

5 tablespoons unsalted butter, cut small

1/8 teaspoon salt

Combine flour, oats, sugar and salt. Add butter and work it in with your fingers to pea sized pieces. Add walnut pieces

Filling:

11 Paula Red apples (they were small, so if you're using larger ones you may only need 6)

¼ to ½ cup sugar (depending on tartness of apples)

1 teaspoon cinnamon

Peal, core and cut apples. Toss with cinnamon and sugar. Put in a buttered 2 quart dish. Top fruit with crumb topping. Bake at 350 for 1 ¼ hours to 1 ½ hours.


TWD Lenox Almond Biscotti

Posted by BAKE-EN at 9:10 AM 21 comments


I've made a lot of biscotti recipes over the past few years. They were on my production list when I worked at Bouchon, so I've made literally thousands of them. I once made 5 different kinds of biscotti for everyone I knew as Christmas gifts. All that being said, I love really good biscotti. My definition of good biscotti is a cookie that's firm on the outside, but still a little soft on the inside. I hate biscotti that cause me to contemplate calling the dentist, as in; did I just break my tooth on this thing?

After reading Dorie's description of these cookies, I decided they were a must try. At first I was going to make one of the playing around recipes, but when I read that she makes these cookies in double batches twice a week, I thought maybe I should try the original recipe first. I'm glad I did. The recipe itself is really easy. Basically cream butter & sugar, add eggs, add dry, fold in nuts. One thing that surprised me was that Dorie didn't call for resting the dough. I find that biscotti dough firms up, and is easier to form into a log if you let it rest in the fridge for a while. That being said, I followed Dorie's directions, and I formed the logs right after making the dough.


They were a little sticky, but easy enough to shape. I was surprised by how much my biscotti spread in the oven, but they ended up looking great once I cut them.


This turned out to be one of the most delicious biscotti's I've ever eaten. The almond flavor is amazing, it actually tastes like there's almond paste in the cookies because they're so tender on the inside. I found Dorie's description of them to be true "crunchy but not rock solid, dippable, dunkable and eminently munchable." Many thanks to Gretchen of Canela & Comino for choosing this recipe. Because of you, Gretchen, I was able to justify eating a cookie for breakfast this morning. Anyone interested in making this recipe, can find it on Gretchen's website.


Tuesday, October 7, 2008

TWD Caramel Peanut Topped Brownie Cake

Posted by BAKE-EN at 4:43 AM 23 comments

How fabulous is this cake?


  1. I've made it 4 times in the past year.
  2. Peanut butter, caramel and chocolate.
  3. Beautiful, shiny caramel topping for extra sparkle.
  4. It's impossible to have just one piece.

Someone had to pick this recipe, and I'm glad that Tammy of Wee Treats by Tammy did just that. I can't wait to see how much the other TWD'ers loved this recipe.

The recipe is very straight forward. I have a few pointers to help anyone who is going to make this cake based on my own experience.

  1. Make sure to not overcook your cake. When you think about it, it's a brownie cake, and honestly; who doesn't love a brownie that's a little underdone? I made the mistake of drinking a little too much vino while making the cake for Thanksgiving last year. Oops, I left it in the oven a little too long. It wasn't burned, but it was too dry for my liking.
  2. Watch your caramel very closely. It can go from beautiful amber to bitter black very quickly. Also, never add cold cream to a caramel. It results in major caramel eruptions. Instead, slightly warm the cream, or at least make sure it's room temp. The caramel will still sputter when the cream is added, but not nearly as much as it would if adding cold cream.

I hope everyone enjoyed this cake as much as I have in the past.


Bake-En Copyright 2009 Sweet Cupcake Designed by Ipiet Templates Image by Tadpole's Notez