Tuesday, June 24, 2008

TWD Mixed Stone Fruit Cobbler

Posted by BAKE-EN at 7:20 PM 16 comments

Remember in college when you had to completely clean your room from top to bottom before you could even consider studying? I don't know why, but I just HAD to clean my kitchen today BEFORE making the cobbler from Baking from My Home to Yours. I know it was pretty clean to being with, but when I have the cleaning bug (rarely happens, must be a full moon); I have to clean everything. Now with all my appliances dusted, dishes sparkling, floor gleaming as only a clean floor can… I will get flour everywhere J

Beth of Our Sweet Life chose Dorie's Mixed Berry Cobbler
(pages 416-417) as this weeks TWD recipe. I was really excited to make this recipe till I went to the grocery store and discovered the berries are a bit out of my budget right now. Luckily, the stone fruits were on sale, and they looked surprisingly good for this time of year.

I decided to cut the recipe in half because a cobbler that serves 8 is a little too much for two people. It's not that we can't eat 8 servings, it's that we can (and would), so I halved it. The thing about the topping I changed was I used whole milk instead of cream. After adding the milk, I realized I should have either upped the flour or decreased the liquid. My cobbler topping was a bit on the mushy side, but it came out fine anyway J

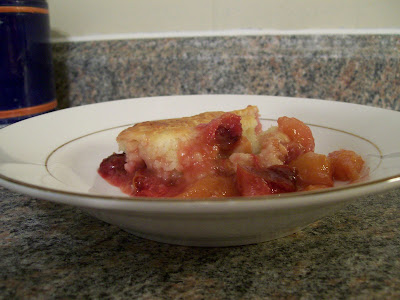
For the fruit filling, I used white and yellow peaches, yellow nectarines and beautiful red/purple plums. I decided to leave the skin on the plums because I knew the color would permeate the filling making it a gorgeous color. I did remove the skin on the peaches and nectarines though because Joe doesn't like the texture of skin in baked goods. I followed Dorie's sugar/cornstarch ratio except I used brown sugar instead of plain-old granulated.

The results were good. I guess when it comes down to it, if I have great fruit I prefer to make pies instead of cobblers. That being said, if I'm ever in a crunch, I would make this again.


Here are some photos:

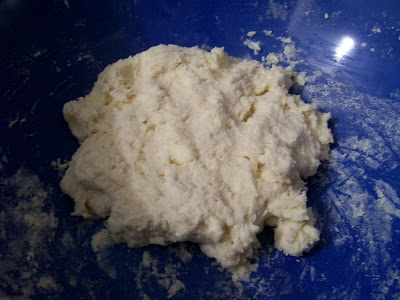
The flour-butter mixture before adding the milk:


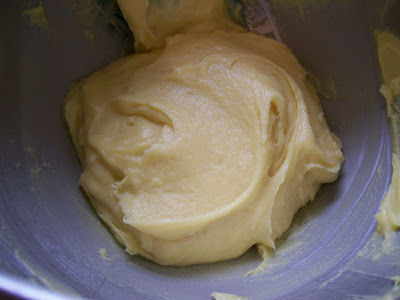
After the milk addition:


The lovely fruits:


The fruit after being sliced and adding the brown sugar/cornstarch (and a pinch of salt):


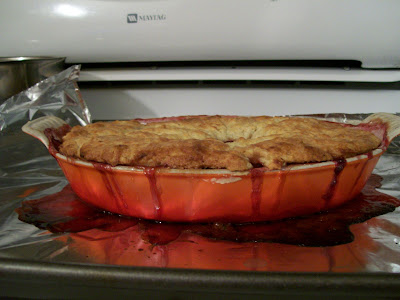
With the topping in the oven:
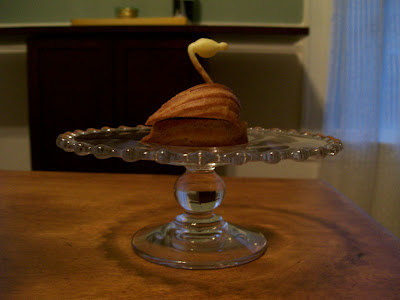


Viola:


Tuesday, June 17, 2008

Gougères from Tartine

Posted by BAKE-EN at 2:23 PM 7 comments

It was a beautiful fall day last year, when Joe and I decided to drive to San Francisco to get treats from Tartine. At the counter we ordered a plethora of items; quiche, croissant, lemon meringue cake, chocolate cookies and gougères. With our bounty in hand, we walked over to the park for a nice picnic. While sitting there, enjoying the sun; Joe said (holding a half eaten gougères in his hand) "Can you make this?" I replied "Yeah, it's just pate a choux with cheese and herbs." The look on Joe's face was of astonishment (at how easy I made it sound), and then hurt "why haven't you made these yet?"

9 months later (after moving from Napa to Boston), I picked up the Tartine Cookbook at my library. As soon as I saw the Gougère recipe, I knew I had to make it for Joe. Joe was like a kid in a candy store once I told him I was making them to go with our dinner that evening. The first thing he did was he ran to our local wine store and picked up a bottle of Domaine Roger Perrin Cuvée Prestige Veielles Vignes Côtes Du Rhône 2005 (long name, perfect pairing). For dinner that night we had grilled pork chops (thick cut) with a mustard-thyme sauce, a salad and the gougères. The wine, chops and gougères paired perfectly together.


The cheese I used:


Close up of the fresh thyme:


Here I am mixing the dough on the stovetop:


The dough after adding the eggs, cheese and fresh thyme:


The gougère before baking. I also made little greyere crisps to put on the salad (in case you're wondering what the little piles of cheese are all about):


Close-up:


Close up of some small ones that I froze:


The final, glorious product:

TWD Not Even Close to a Peppermint Cream Puff Ring

Posted by BAKE-EN at 12:39 PM 19 comments

Little known fact, there's nothing I love more than pâte à choux. Every aspect of this dessert appeals to me; from making the dough on the stovetop, mixing in the eggs, to baking off these beauties. Growing up, my grandmother would make cream puffs as her extra special dessert. She would make them only for the most important events (wedding showers, Easter). Everyone in my family would be so excited to eat them. We would know she was making cream puffs weeks before she actually did, and the anticipation would grow as the event drew closer. Being so young at the time (5 or 6-years-old), I remember the puffs to be enormous, softball sized pastries filled with chocolate pudding. I'm sure they were smaller then my memory recalls, but small hands recall big memories J


I made these for my 30th birthday party, so there aren't many pictures. We made so many items for the party, that I barely had time to make everything; let alone snap pictures. Joe and I had about 25 people over, and we had at least 6 appetizers, Middle Eastern pizzas, regular pizzas, brownies, strawberry shortcakes (I actually forgot to put them out), choux swans, éclairs sable cookies and the birthday cake my husband made for me. We're still eating leftovers 3 days later.


I decided to make chocolate pastry cream instead of the peppermint cream. Mint only appeals to me when it's in a Girl scout thin mint. Dorie's chocolate pastry cream recipe was easy to follow, and it resulted in a smooth very nice pastry cream. I have seen pastry cream recipes where the end result is something like a creamy jello jiggler (are those still around?). Luckily, this recipe was a beautiful thick pudding.


The choux recipe was easy to follow as well. I ended up making mini-eclairs, mini Paris-Brest and swans. I learned how to make swans when I was at the CIA. They are so fun to make, that I'm always looking for an excuse to make them again. Many thanks to Caroline of A Consuming Passion for choosing this recipe as this weeks TWD recipe; any excuse to make swans is highly appreciated.


Here's a photo of the choux paste:


This is what happens when you leave your brother alone with a deformed eclair and deformed Paris-Brest. I laughed so hard when I saw this:


A swan:


Final group photo:


One final note, check out my post on the gougères I made from Tartine's cookbook. It's interesting to see how pâte à choux can be both savory and sweet.

Tuesday, June 3, 2008

TWD French Chocolate Brownie

Posted by BAKE-EN at 9:23 AM 30 comments

Di of Di's Kitchen Notebook chose French Chocolate Brownies on pages 92-93 as this weeks TWD recipe. I swore to myself I wasn't going to make these brownies because:

A: My life is super hectic right now (changing jobs, my 30th birthday in two weeks, 7 weddings this summer)

B: The only thing I hate worst then raisins is raisins with rum.

C: Brownies will contribute to my ever widening body.

D: Joe and I did a thorough cleaning of the kitchen yesterday, and it looks fabulous.


That being said; here I am blogging, with my brownies in the oven.

The recipe was extremely easy to follow. I had some Plugra left over from the brioche dough we made last week, so that's the butter I used. I also used Callebaut dark chocolate. As for the rum and raisins, those were not included. I did add a small handful of dried cranberries to one corner of the brownies. I plumped them in the water that was simmering for melting the chocolate. I also didn't have foil, so I used parchment instead to line the pan. Here are some pictures pre-baking:


What resulted was a perfect brownie. So perfect, in fact, I have a belly ache to prove it. I loved the crackled top, and how fudgey they were. I didn't care for the section with the cranberries as much as I did for the plain brownie section. I will make these again (and again, and again...).


Here's the recipe:

French Chocolate Brownies

- makes 16 brownies

-Adapted from Baking From My Home to Yours.

Ingredients

1/2 cup all-purpose flour

1/8 teaspoon salt

1/8 teaspoon cinnamon (optional)

1/3 cup raisins, dark or golden

1 1/2 tablespoons water

1 1/2 tablespoons dark rum

6 ounces bittersweet chocolate, finely chopped

1 1/2 sticks (12 tablespoons; 6 ounces) unsalted butter, at room temperature and cut into 12 pieces

3 large eggs, at room temperature

1 cup sugar

Getting ready: Center a rack in the oven and preheat the oven to 300°F. Line an 8-inch square baking pan with foil, butter the foil, place the pan on a baking sheet, and set aside.

Whisk together the flour, salt and cinnamon, if you're using it.Put the raisins in a small saucepan with the water, bring to a boil over medium heat and cook until the water almost evaporates. Add the rum, let it warm for about 30 seconds, turn off the heat, stand back and ignite the rum. Allow the flames to die down, and set the raisins aside until needed.Put the chocolate in a heatproof bowl and set the bowl over a saucepan of simmering water. Slowly and gently melt the chocolate, stirring occasionally. Remove the bowl from the saucepan and add the butter, stirring so that it melts. It's important that the chocolate and butter not get very hot. However, if the butter is not melting, you can put the bowl back over the still-hot water for a minute. If you've got a couple of little bits of unmelted butter, leave them—it's better to have a few bits than to overheat the whole. Set the chocolate aside for the moment.Working with a stand mixer with the whisk attachment, or with a hand mixer in a large bowl, beat the eggs and sugar until they are thick and pale, about 2 minutes. Lower the mixer speed and pour in the chocolate-butter, mixing only until it is incorporated—you'll have a thick, creamy batter. Add the dry ingredients and mix at low speed for about 30 seconds—the dry ingredients won't be completely incorporated and that's fine. Finish folding in the dry ingredients by hand with a rubber spatula, then fold in the raisins along with any liquid remaining in the pan.Scrape the batter into the pan and bake 50 to 60 minutes, or until the top is dry and crackled and a knife inserted into the center of the cake comes out clean. Transfer the pan to a rack and allow the brownies to cool to warm or room temperature.Carefully lift the brownies out of the pan, using the foil edges as handles, and transfer to a cutting board. With a long-bladed knife, cut the brownies into 16 squares, each roughly 2 inches on a side, taking care not to cut through the foil.

Serving: The brownies are good just warm or at room temperature; they're even fine cold. I like these with a little something on top or alongside—good go-alongs are whipped crème fraiche or whipped cream, ice cream or chocolate sauce or even all three!

Storing: Wrapped well, these can be kept at room temperature for up to 3 days or frozen for up to 2 months.


Bake-En Copyright 2009 Sweet Cupcake Designed by Ipiet Templates Image by Tadpole's Notez